As we mentioned in our post about making a bigger backyard pool area, we’ve also made some big changes out front. Namely, we now have a legit front walkway and driveway! Break out the champagne! Release the doves! Rewatch the #Scandoval episode of Vanderpump Rules (or whatever else people like Sherry do to celebrate). I know this may seem unworthy of celebration – a driveway? cool story, bro – but when you live without one for THREE YEARS, it feels like a major win.
Why We Needed Parking & Pathways
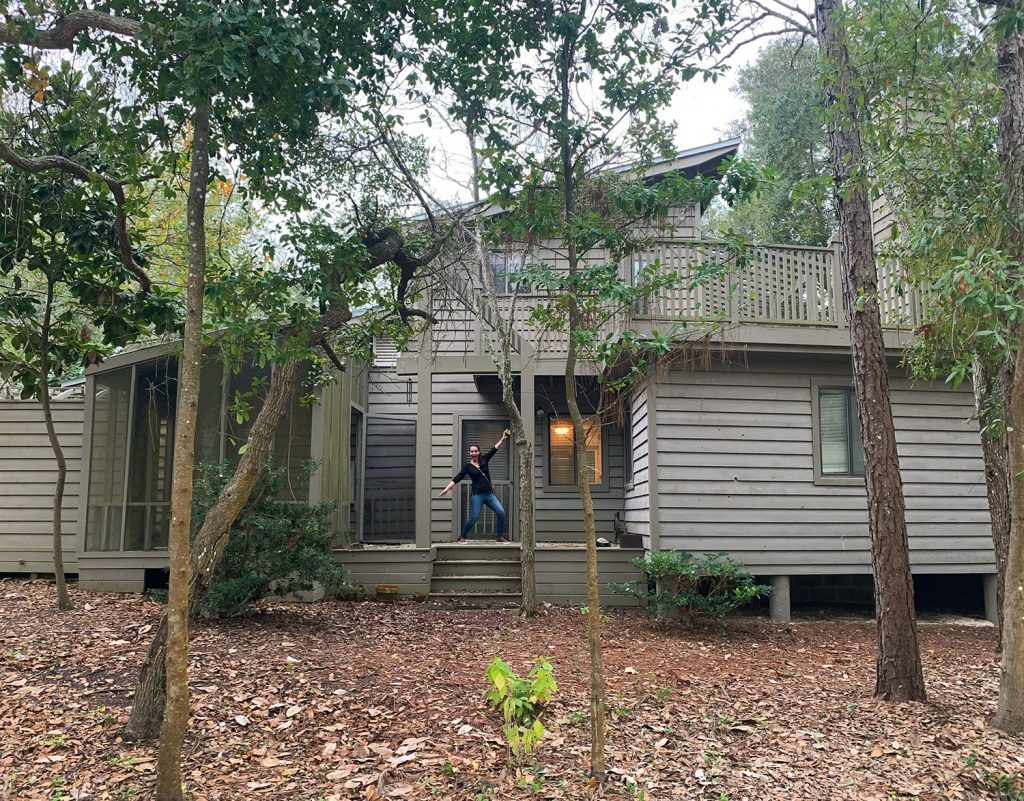
I know most houses come with a place to park your car and some sort of path to the front door. Every other house we’ve lived in certainly did. Some even had garages! But this particular house had no such thing. The entire property, apart from the house, was just pine straw, dirt, and leaves.
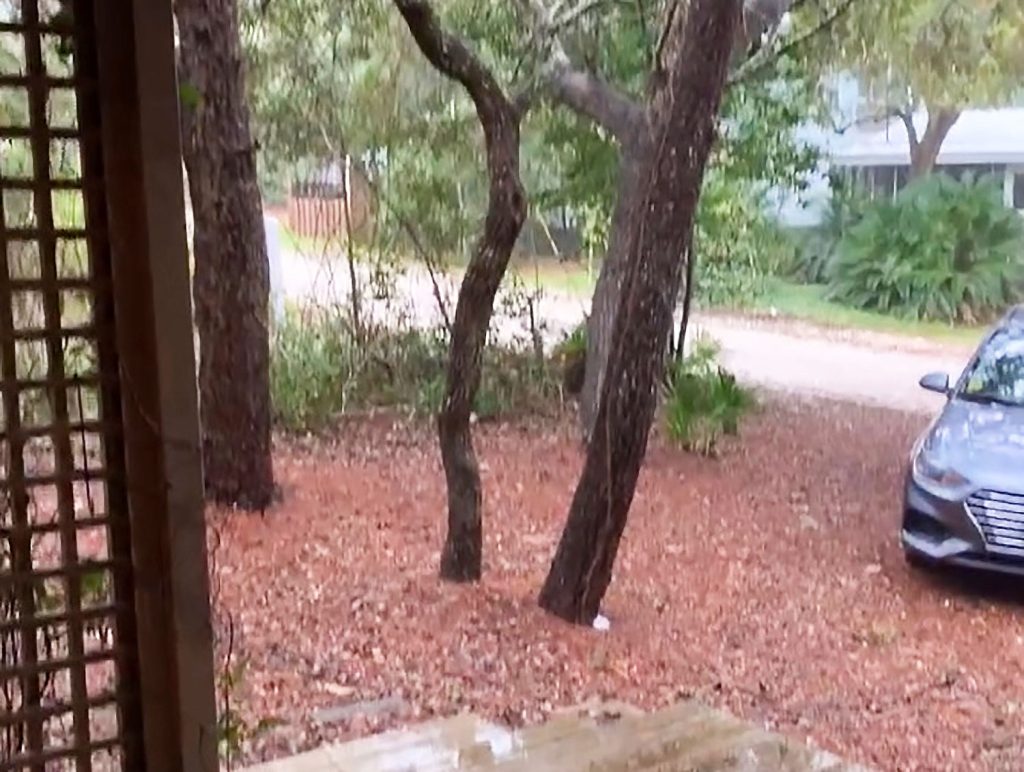
This is a screenshot from a video we made the day we first saw this house. In it, you can see our rental car just kinda pulled randomly onto the pine straw. This is on the other side of our house, taken from what is now our kitchen porch.
The situation didn’t get much better when we finally moved in. Our storage POD had been delivered into that clearing shown above (you can see it below on the right) so I remember calling our contractor on our way down to Florida and asking “um, where do we put our car?” Remember, due to Covid, we didn’t lay eyes on this house any time between putting in the offer in on February 3rd of 2020 and actually moving down in May. He basically said “just find a spot in the pine straw,” so we did (you can see our car, below left).
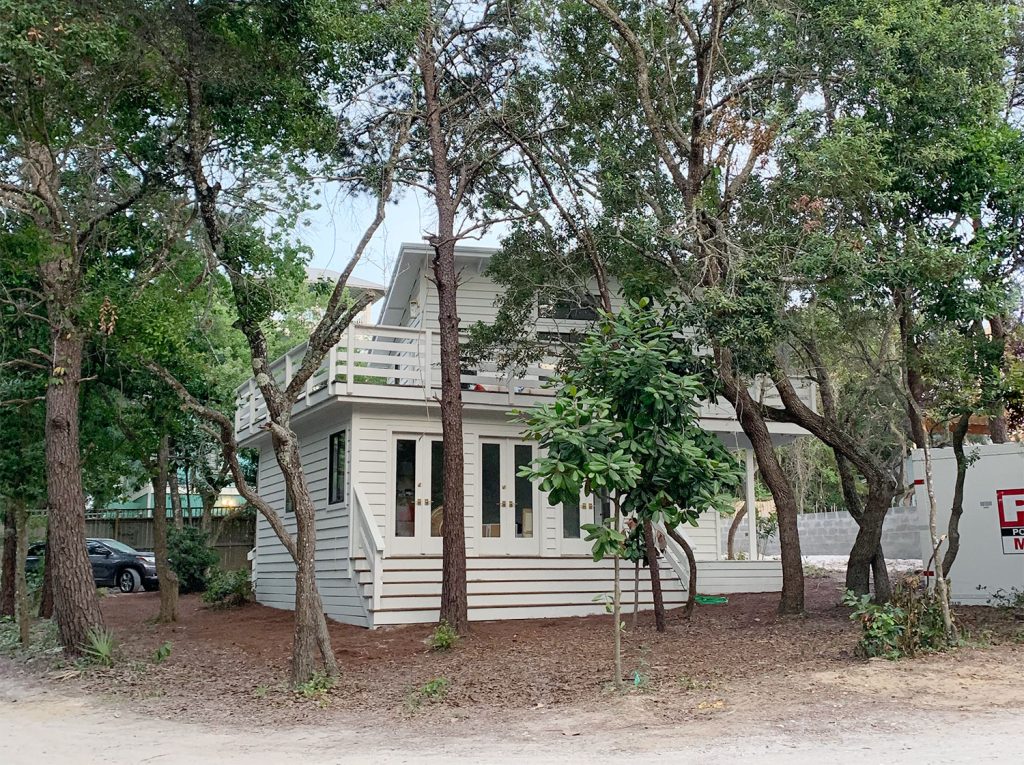
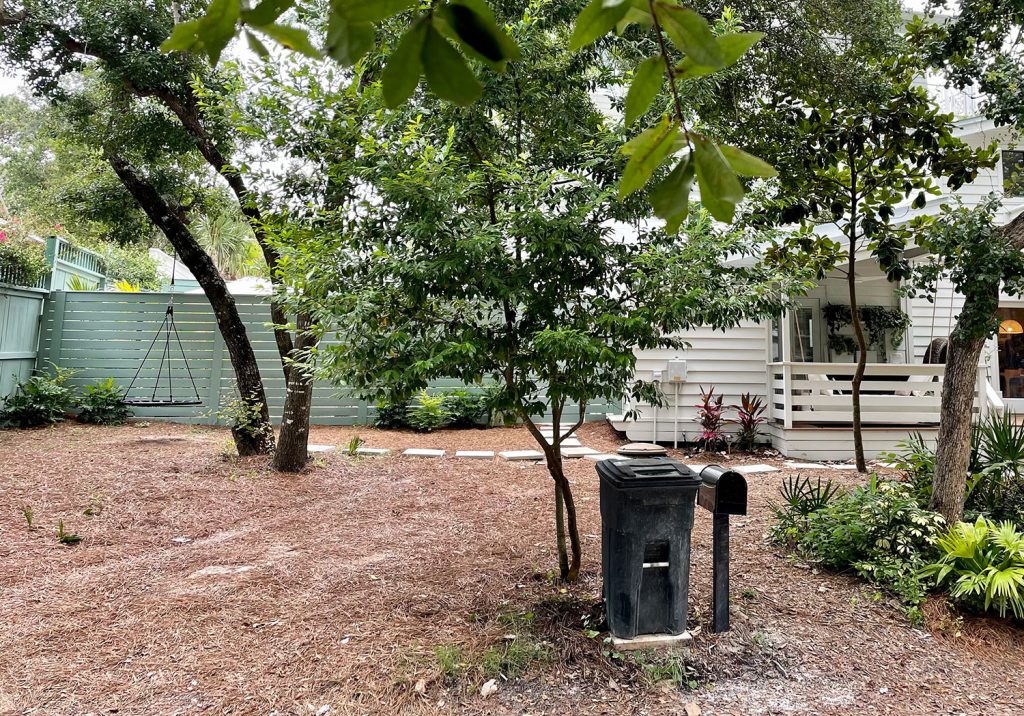
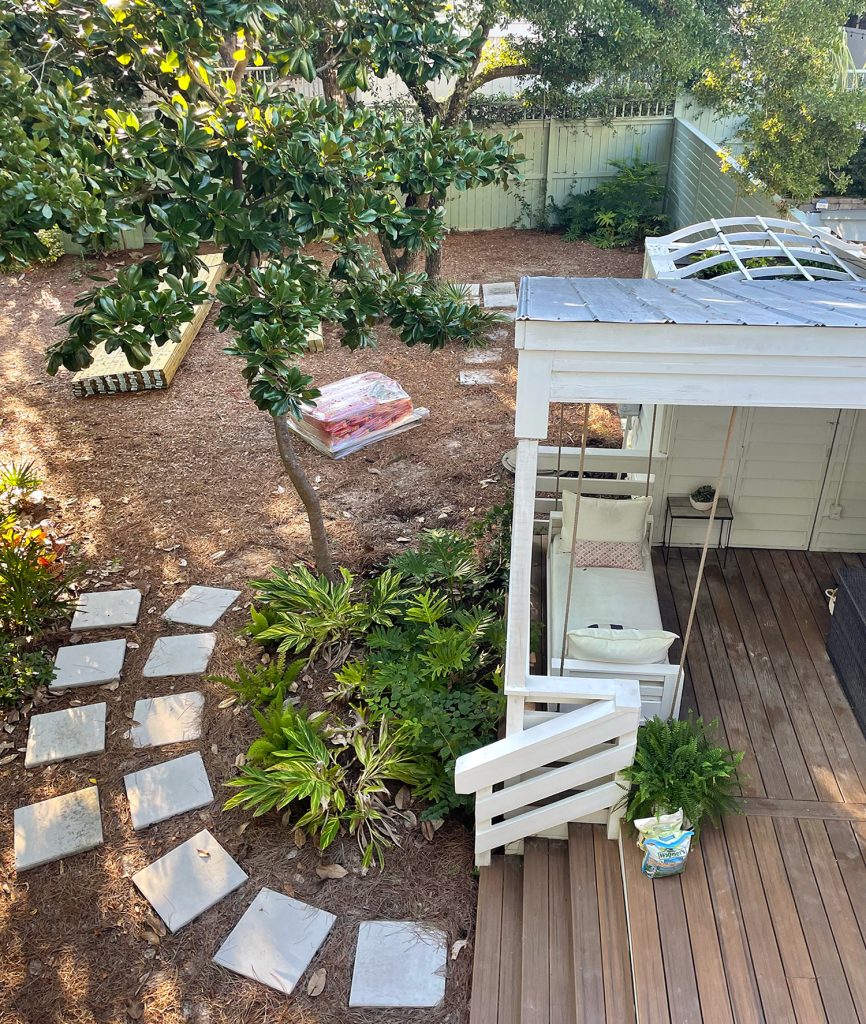
The picture below (from 2021) gives you a closer picture of what became our primary “driveway” for a long time. Just an open area of pine straw. You can also see that we created some pathways around the house using these inexpensive concrete pavers. We didn’t dig them in or anything – just plopped them down as a makeshift way to get around a little more easily. Sometimes a paver would slide out of place or become rickety over time, so we knew eventually we’d do something more permanent.
None of these solutions were inherently bad, we just knew eventually we’d like something that functioned (and looked) a little better for the long haul.
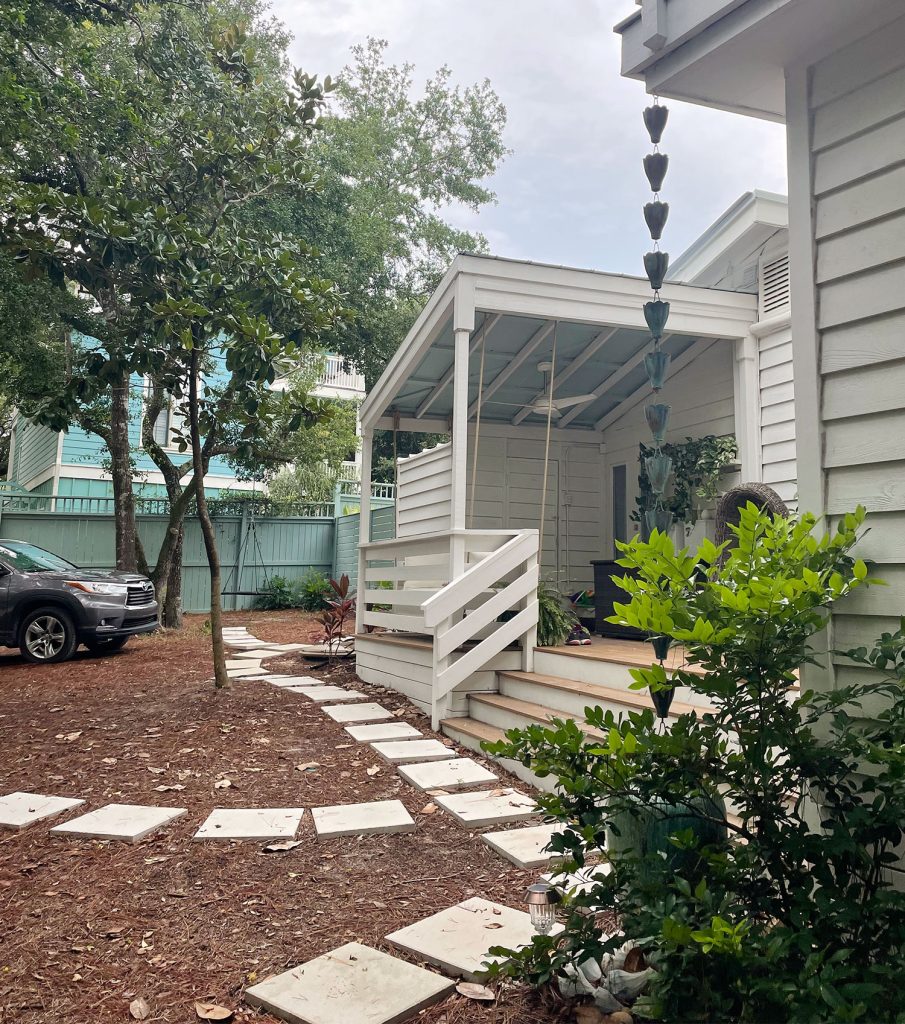
Eventually (as in, later in 2021) we created a gravel parking spot on the OTHER side of our house – almost exactly where that POD (and our rental car) had once been. We had just renovated our covered side porch by adding a new door to our kitchen. This door has become our family’s main entry, mostly because of its convenience to this parking spot right off the kitchen (it makes carrying groceries in a lot easier – and we even have shoe storage in a cabinet on that porch now). You can read more about why we love the kitchen porch here. We’d left an indentation in our fence for precisely this purpose (and to avoid the trees) so we just bought and spread about 15 bags of gravel to make our driveway “official.”
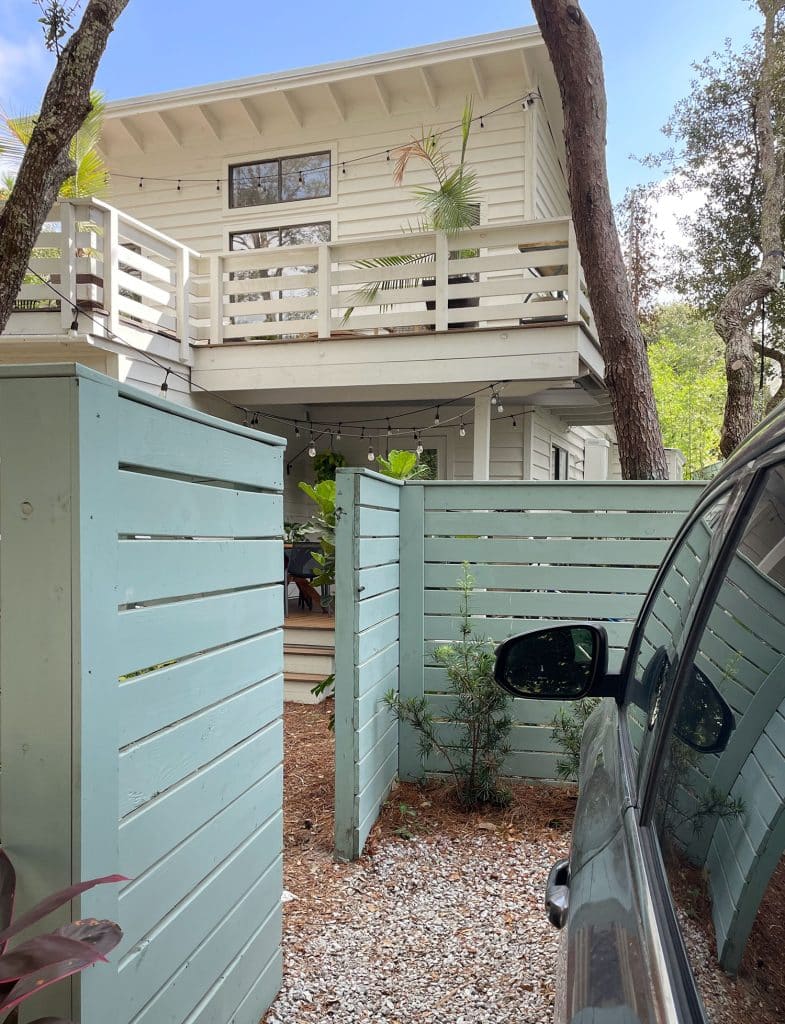
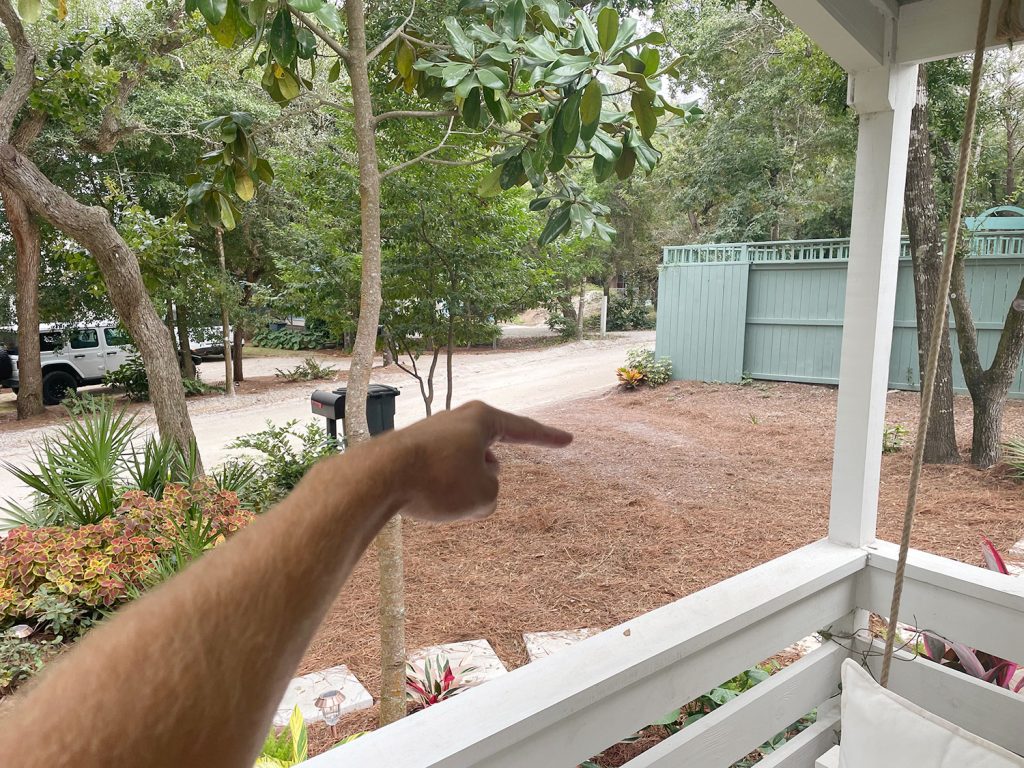
That spot, however, is only big enough for one car. We’re still a one-car household so that totally works…. for us. But anytime a friend comes over, they still have to park in that amorphous pine straw spot out front. Yes, for nearly 3 years we’d often find ourselves sending photos like the one below to direct guests where to park upon arrival. This is an actual picture I sent to my mom once.
Adding A Gravel Driveway
When we undertook our bigger backyard project, part of the goal was to finally create another proper parking spot for two additional cars. We took this into account when we moved the fence AND when the concrete guys were here. As part of that job, we had them pour a low retaining wall to formally designate a driveway area. We thought it would nicely define the parking space while corraling the gravel we planned to put there. Sidenote: can you spot the sunbathing lizard?
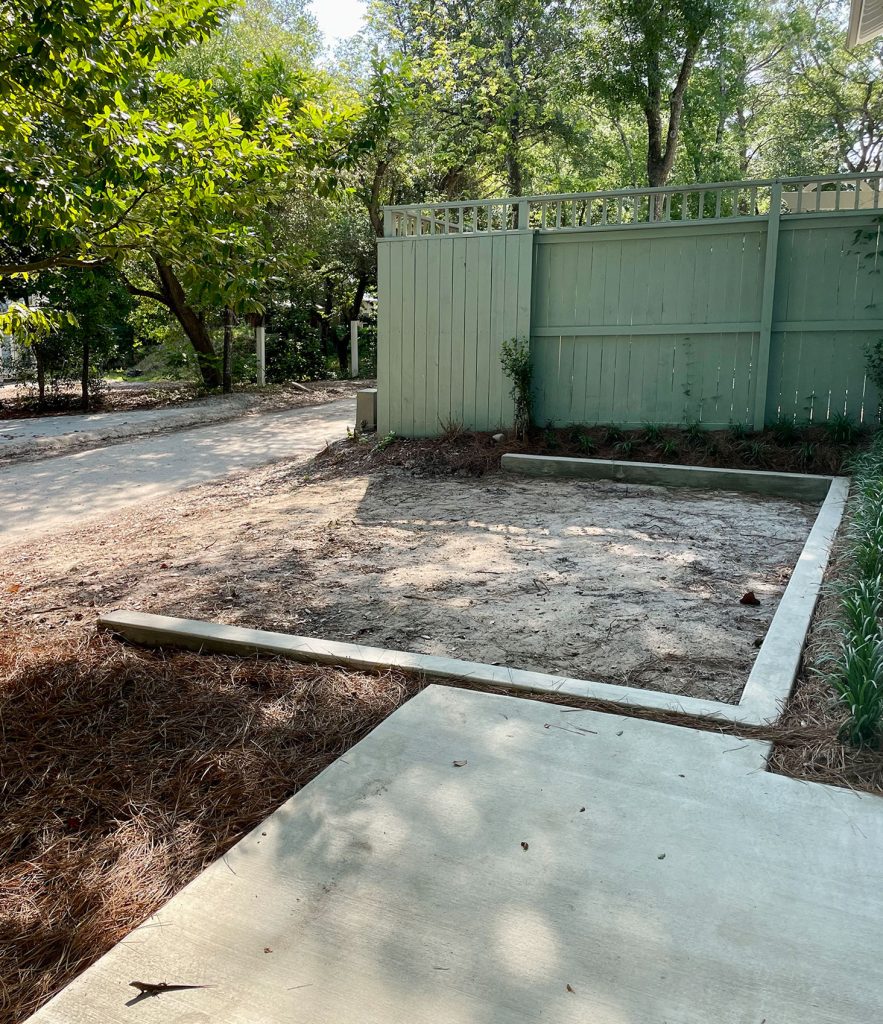
There are lots of reasons why we opted to do a gravel driveway versus other materials like concrete, asphalt, or stone pavers (all of which we also considered – but rock won). A few of the factors were cost, slope, runoff, the general “vibe,” etc. A lot of our neighbors have gravel driveways too, so it fits well in our beachy relaxed neighborhood (hello, we have dirt roads!). We also have rules about how porous (aka: drainage-friendly) certain areas of our lots have to be, and gravel fits the bill for this spot of our yard. We chose a stone called Bahama Rock because it’s a warm sandy white color. We went to a local landscaping company to pick it out and got a delivery the very next day (it was around $500 for this hulking pile of stone).
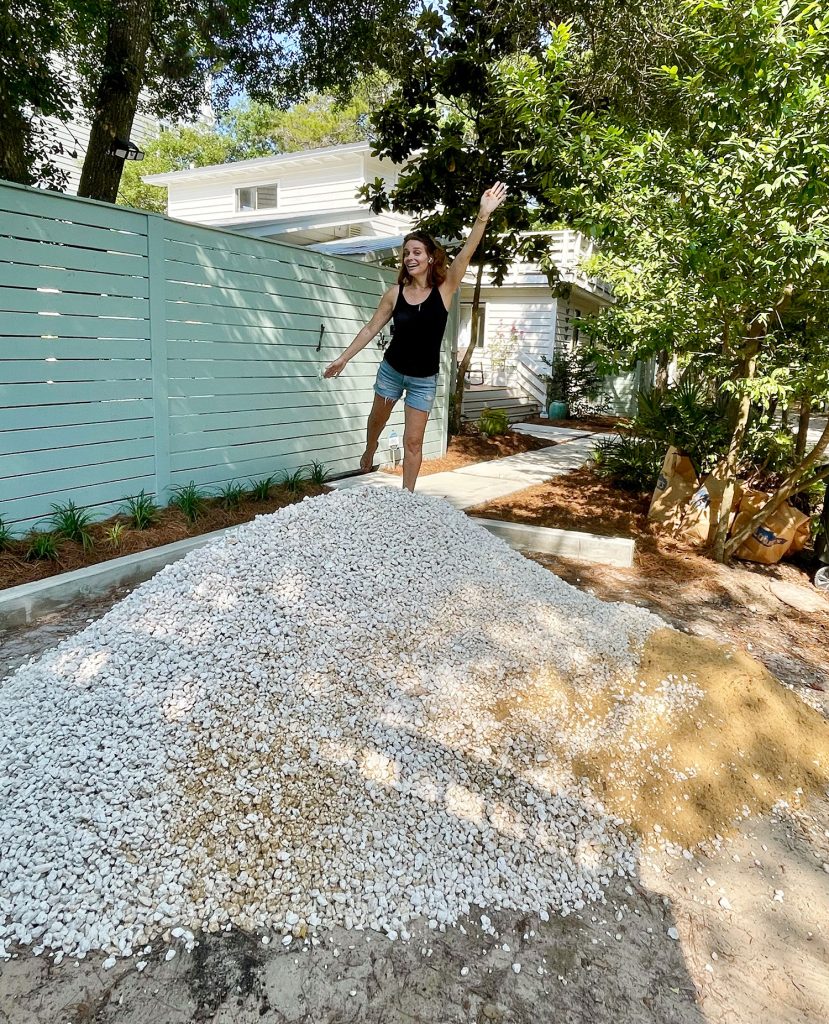
Spreading the gravel was no joke, but we enlisted the help of a neighbor and the three of us were able to knock it out within a couple of hours. We just used shovels to toss piles into various sections, then metal rakes to spread and level it. It shifted under our feet and tires a bit the first few days, but after a couple of weeks and some good rains, it now feels nice and firm.
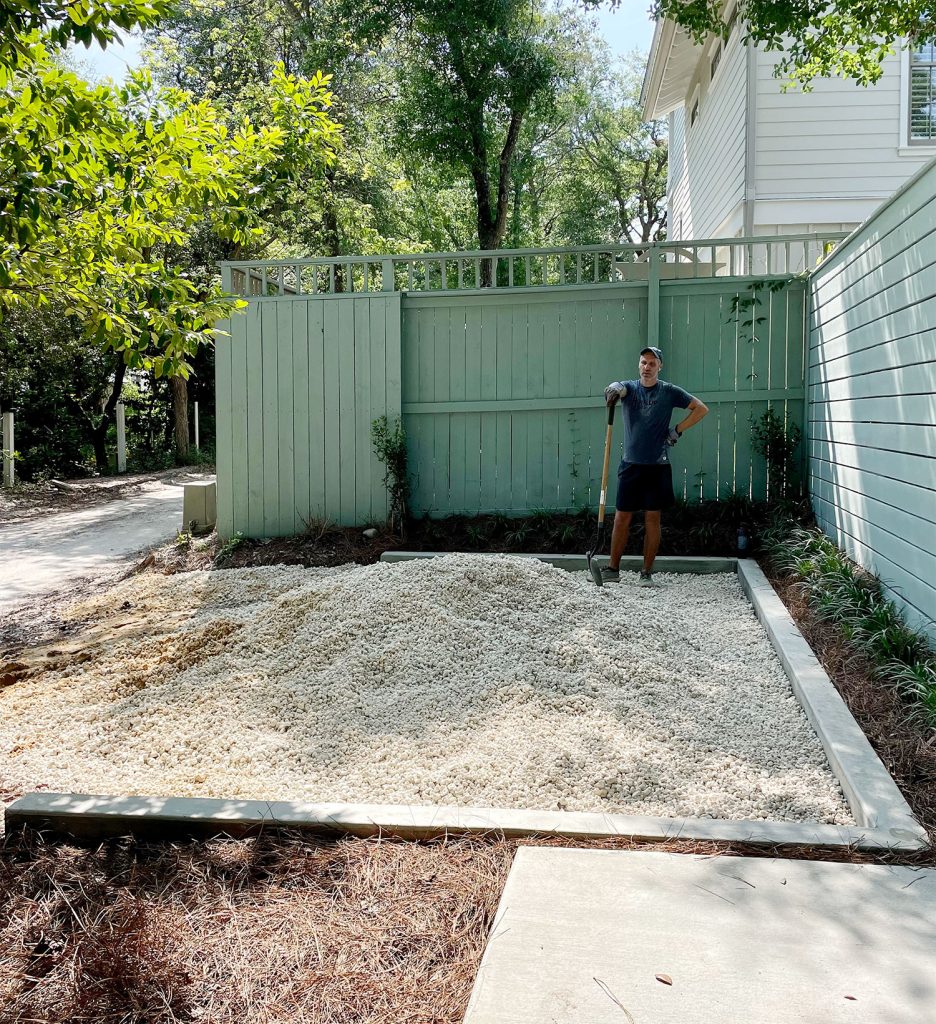
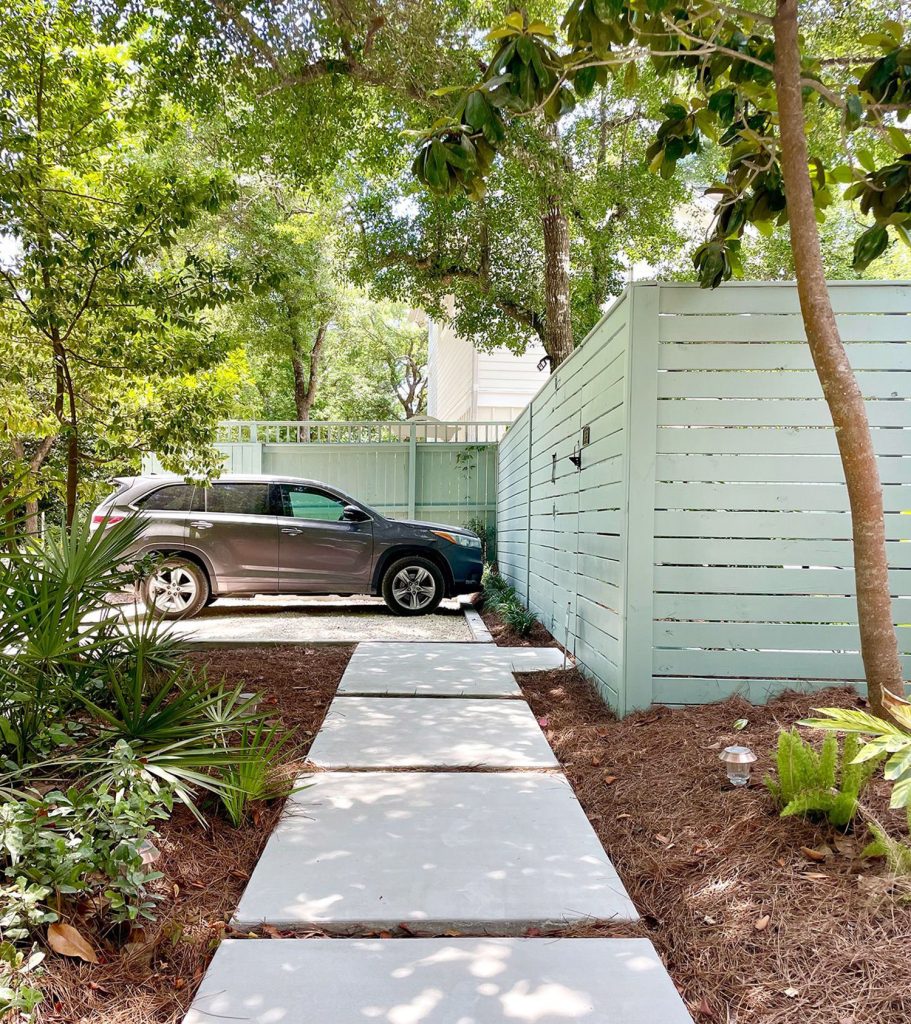
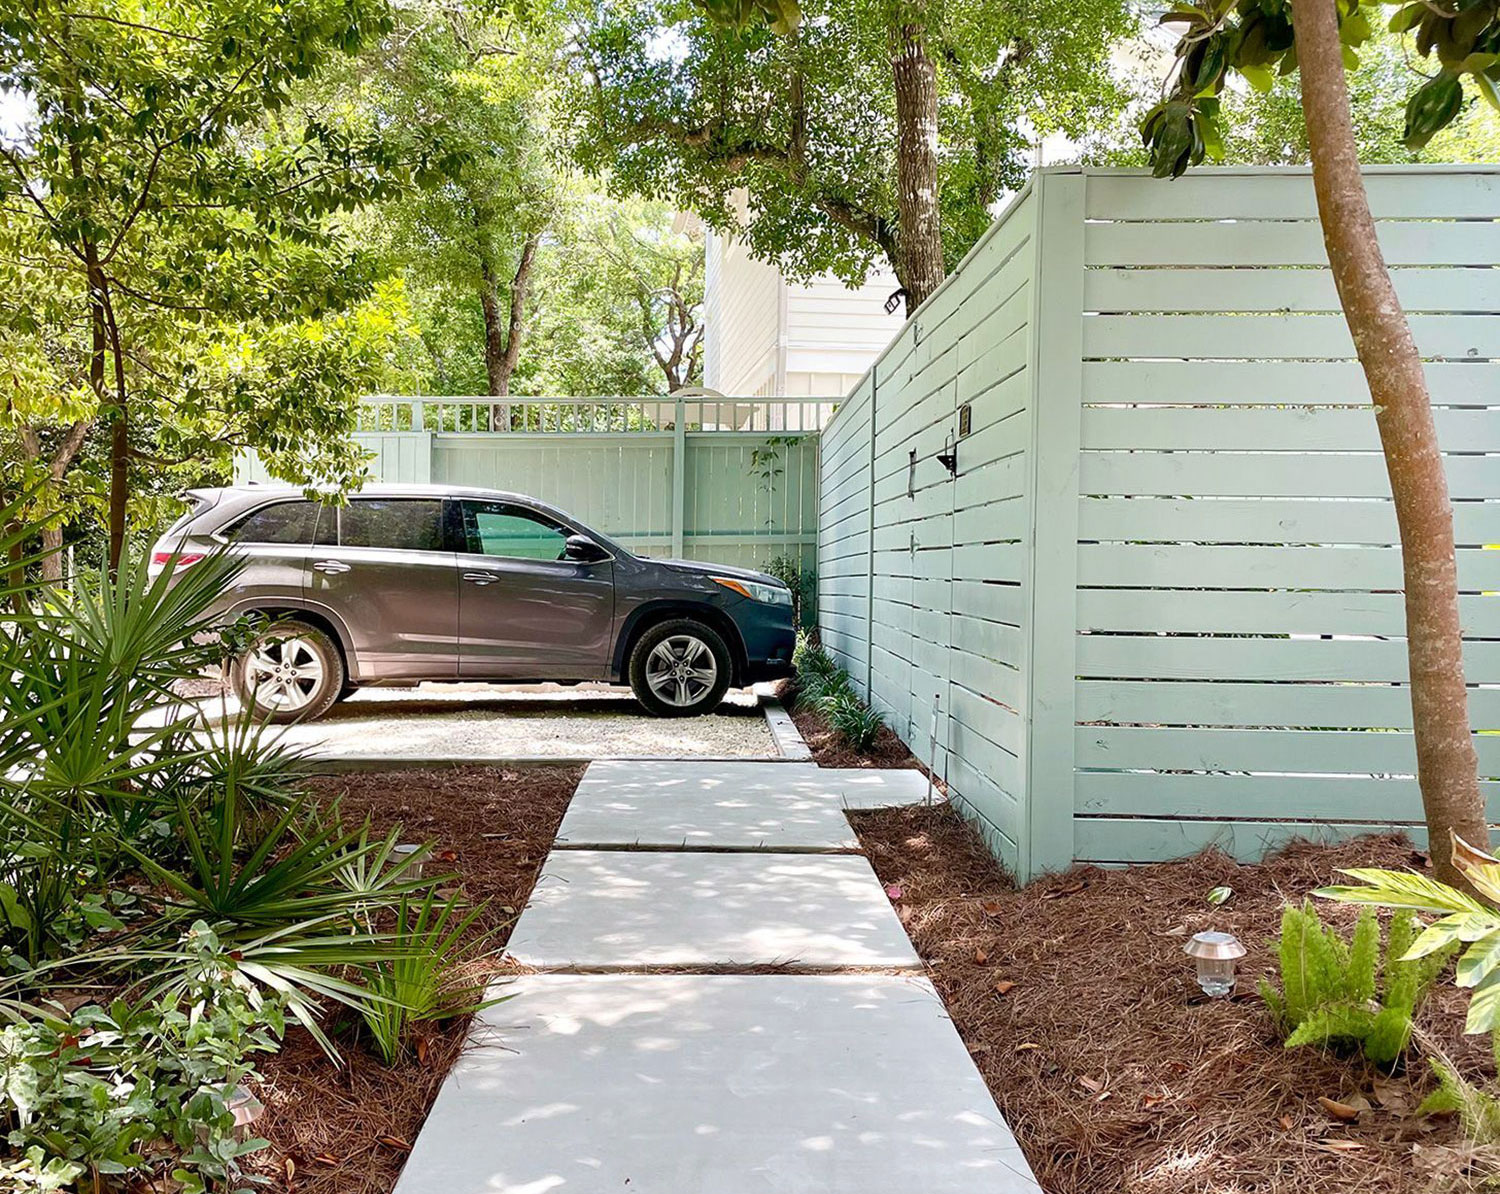
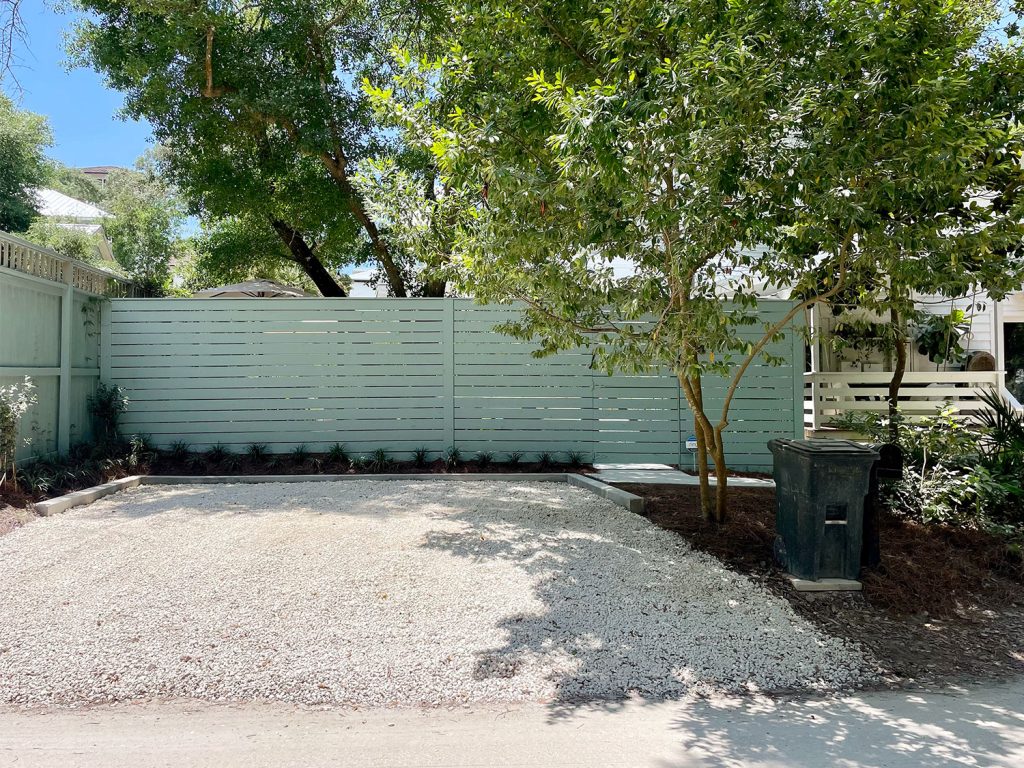
The driveway looks a little small from the angle above, but the view from the street shows its size better. It’s 18′ wide, which is the standard width for two cars. It’s also – lucky for us – exactly what we could fit between the neighbor’s fence and that small tree.
For reference, here’s a similar angle from 2021 (note the tire marks in the pine straw from where my car usually was, since we had yet to add the kitchen porch). While there’s a part of me that misses the “naturalness” of this view before, it was much less functional for us and our guests. Plus, it looked FAR less charming with a vehicle parked there. Note: we moved the fence in front of that beautiful large tree so we could enjoy it from the pool and double the size of the pool area – that’s why you see it behind the fence above and in front of the fence in the photo below.
Our Poured Concrete Front Path
And as we showed in our post about the bigger backyard, we also had a proper walkway poured to connect the new driveway to our front porch. Guests gotta have a place to park their cars AND a way to walk to and from them. We opted for large poured-in-place stepping stones (almost like the bigger more permanent version of the temporary paver walkways we’d used for so long). You can read more about them in this post (which shows how concrete paths and retaining walls completed our bigger pool area.
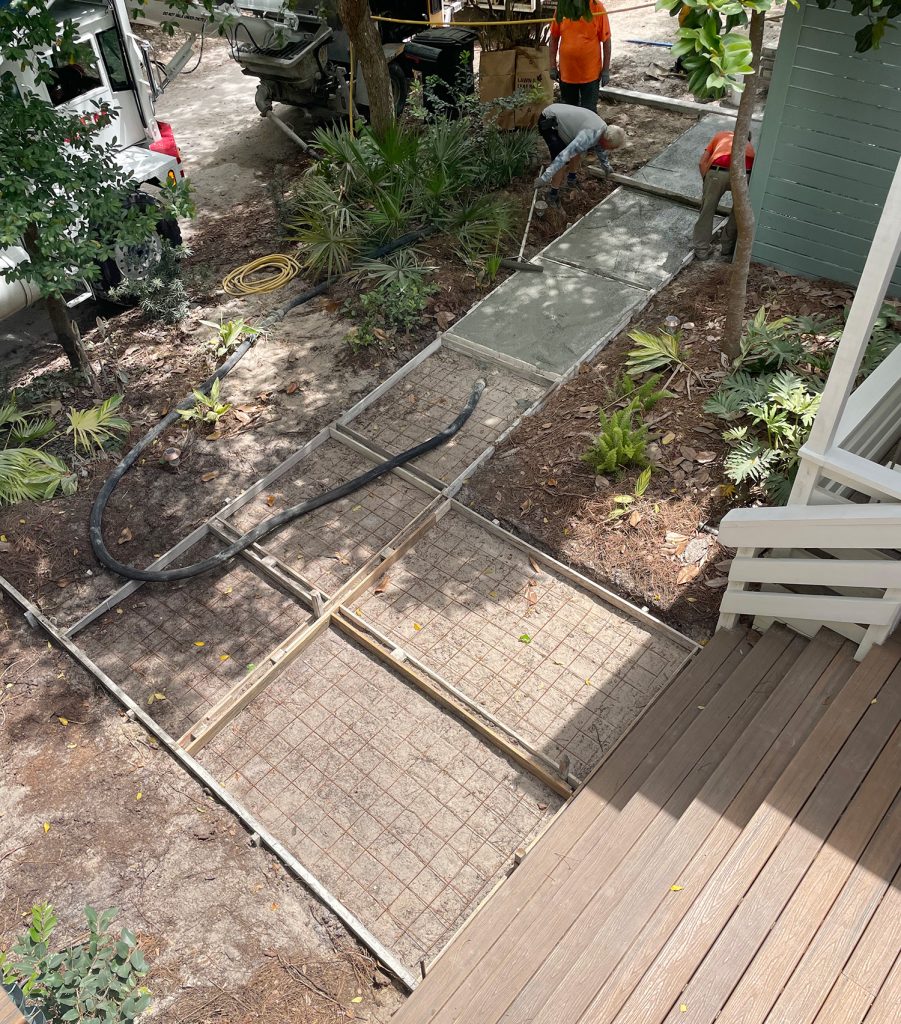
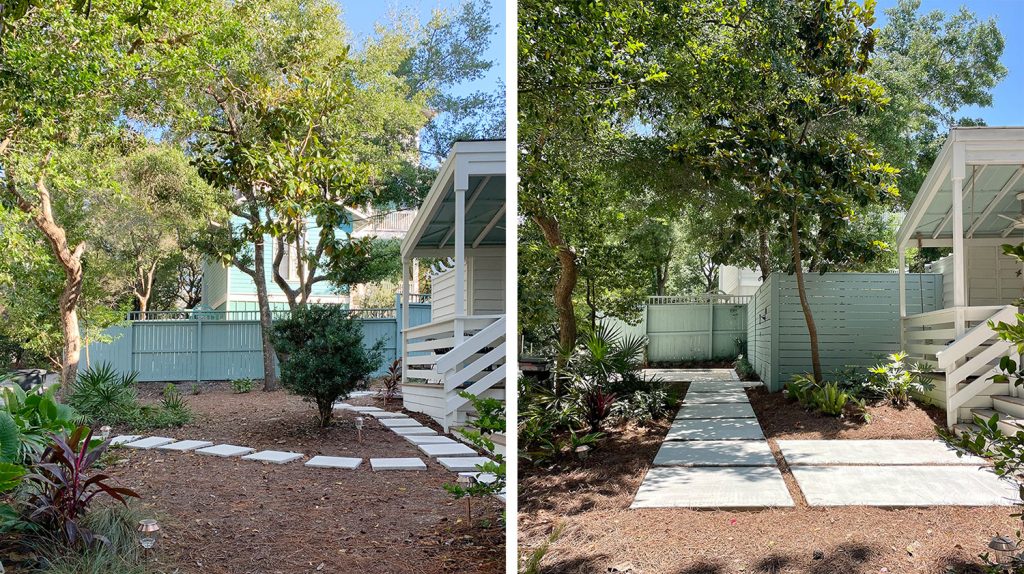
Here’s a before photo we shared in the last post, which shows what the yard looked like with our temporary pavers. Well, sorta. I took this picture as our new fence was being rebuilt, so a bunch of stuff is moved out of place already, but you get the idea.
Now here’s an after that shows the new pathway, parking spot, and our friend’s Jeep taking advantage of the much more officially looking parking area.
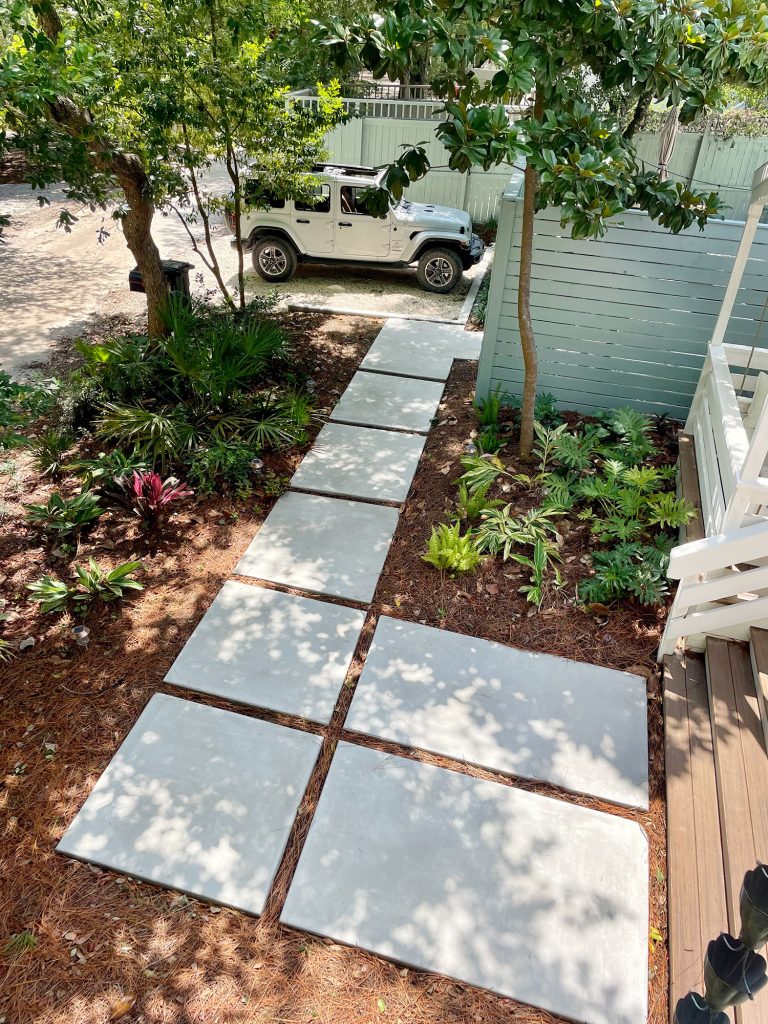
Sometimes we feel a little silly for how happy this new driveway & walkway situation makes us. It’s hard to articulate how “in limbo” the outside of our house has felt for the last three years here, and how basic things like having a proper parking place and a nice wide and stable walking path make it feel like a legitimate home.
Take this before & after, for example. Again, the placeholder-but-we-had-them-for-3-years pavers did the job, but they looked and felt pretty temporary over time. And now these big poured concrete slabs look official and permanent.
If we go back to that before photo I shared earlier: here’s the front when we first laid eyes on this house in February 2020 (you can see all of the exterior before photos here).
And this was a few months after we moved in, as seen in this post from October 2020 (the debut of the small paver pathways). Note: our house number has been altered for privacy below, and removed from the photo after it 😉
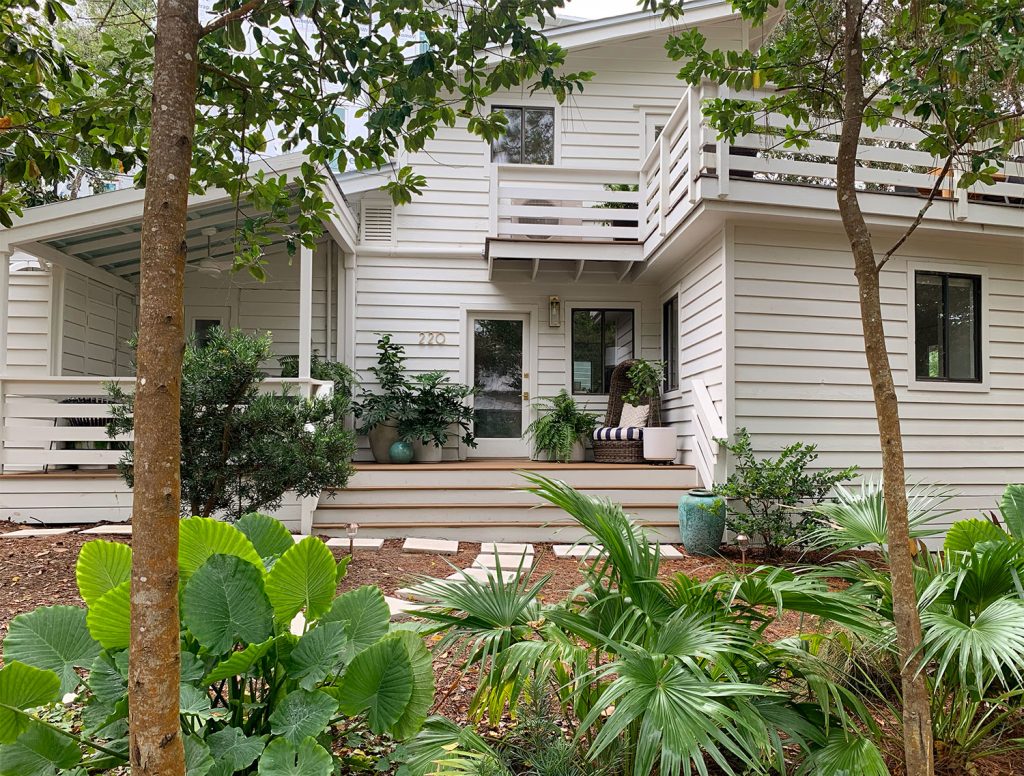
And here we are now!
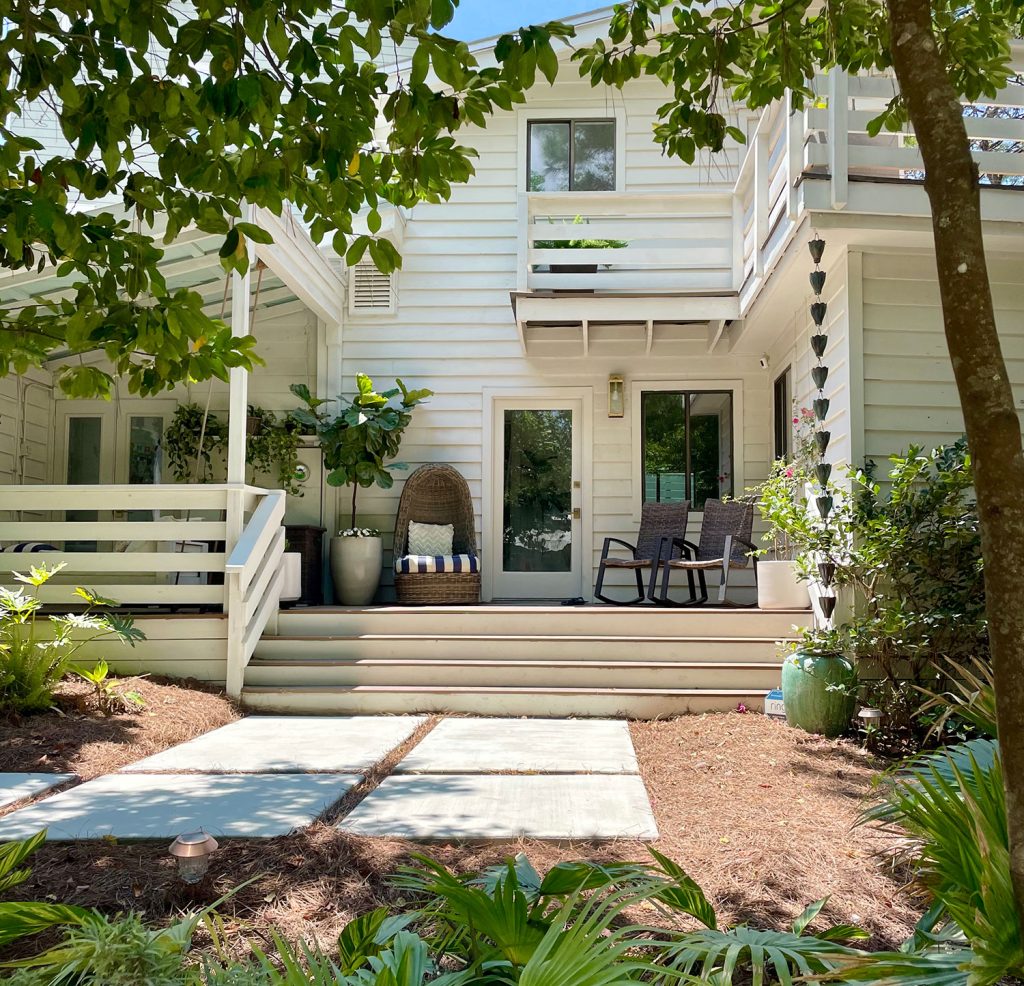
I know some may ask about the decision to not put pavers all the way across the front steps (doing 3 sections instead of 2). We did this for a couple of reasons. Functionally, 1 row is more than wide enough to walk on (each slab is 48″ wide). But also visually, we thought doing 2 leaned into some of the inherent asymmetries of our house. Creating this visual weight on the BOTTOM LEFT of the porch steps helped balance out the visual weight of the deck on the UPPER RIGHT.
You can really see what we mean in this photo below, which is how most people approach our house from the street. The L-shaped upper deck to the right of the door and the L-shaped walkway to the left of the front porch feels balanced and intentional.
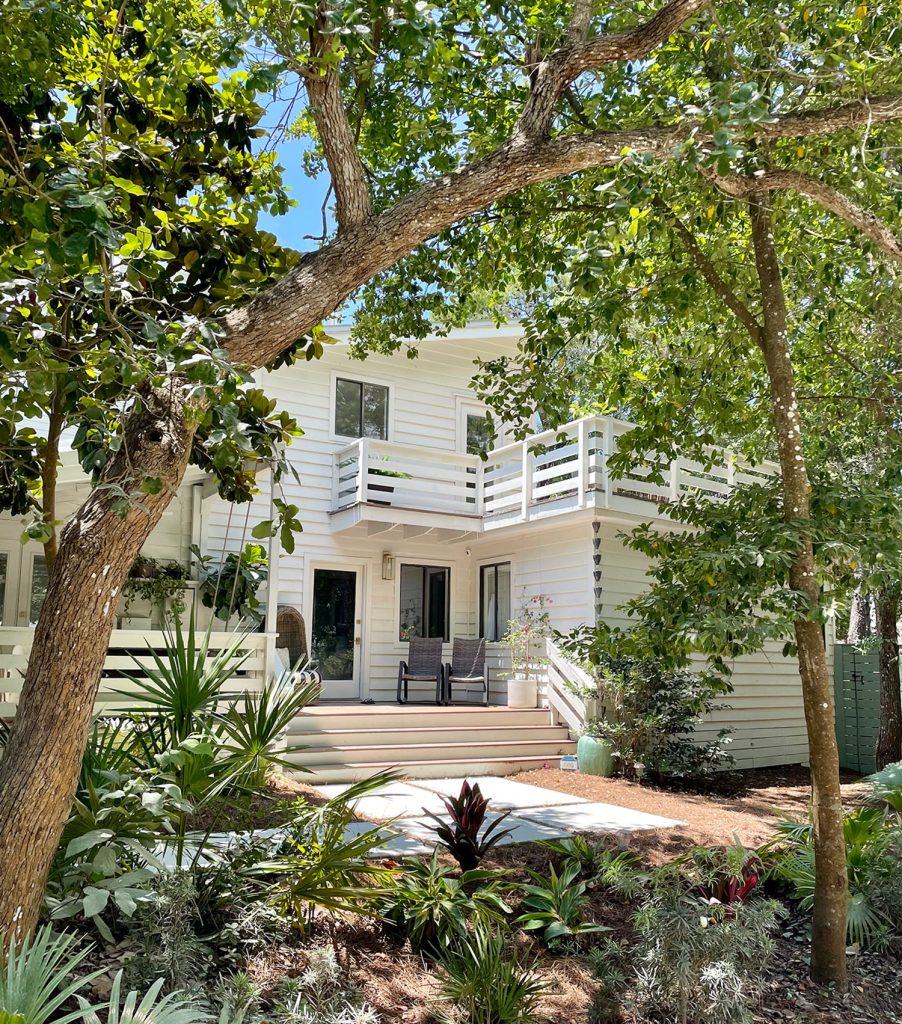
Also if we had done concrete all the way across the front, we thought it would make that area look more like a patio than a pathway (it would be about 13′ wide by 10′ deep!).
A New Path Off The Kitchen Porch
We also had some of these big poured concrete pavers added to our side yard too, which lead from our parking space to the kitchen porch (we had also been using these small square paver stones as a temporary walkway before).
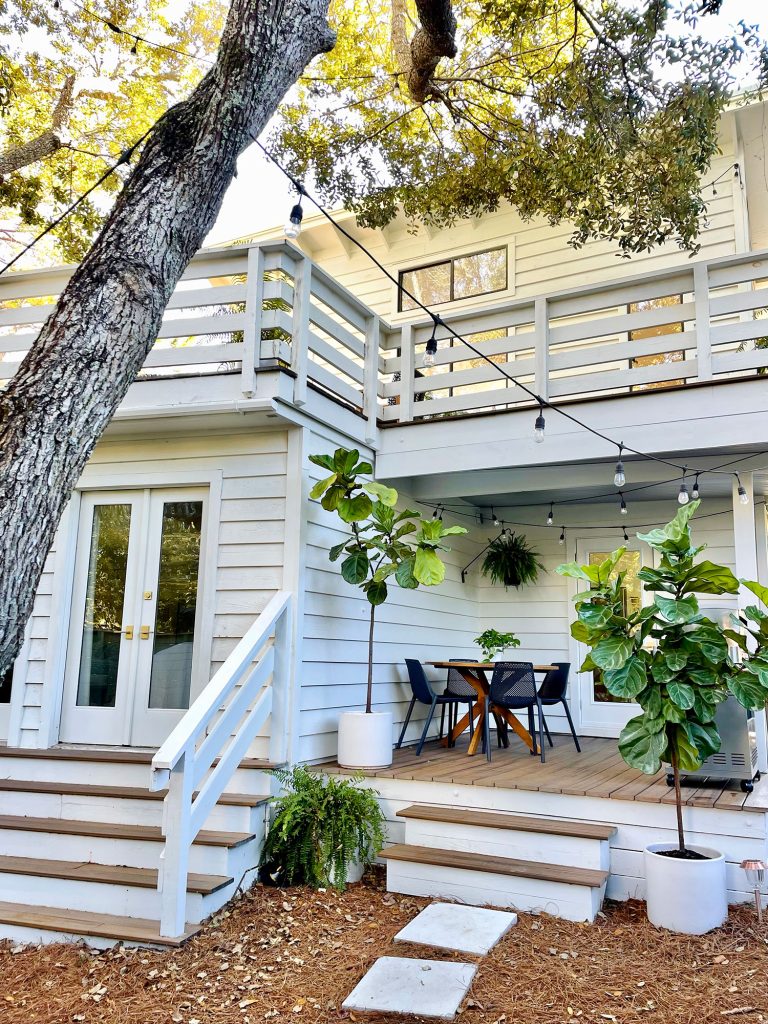
It’s really nice to have these much larger and sturdier permanent slabs that have been poured in place.
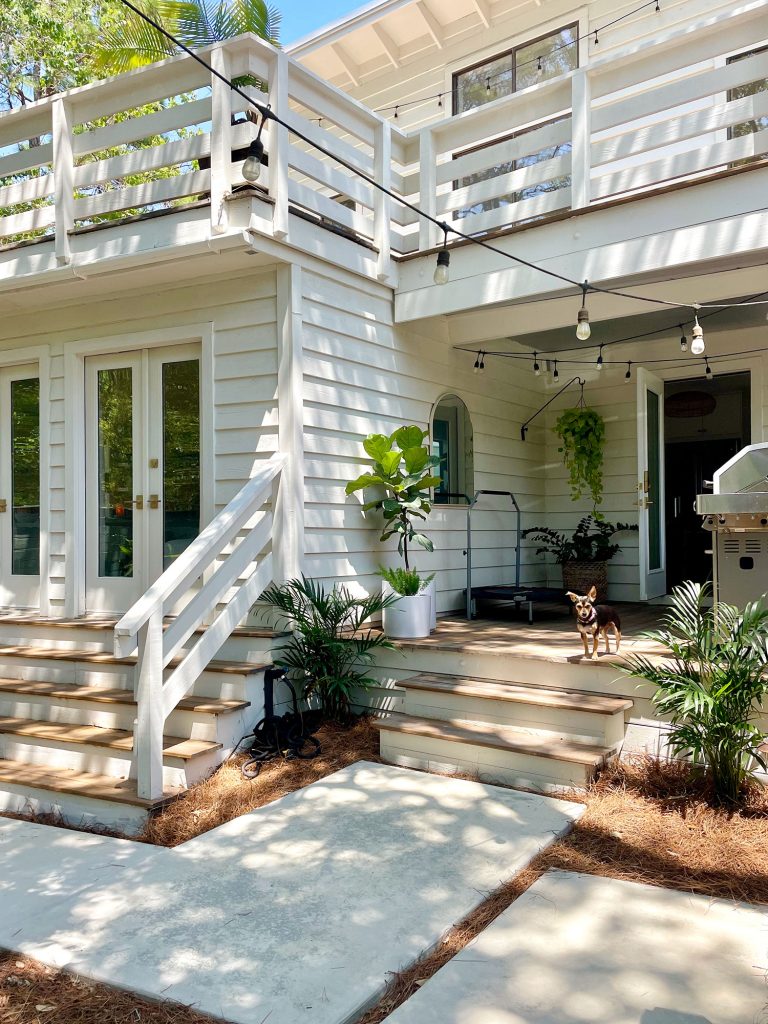
This is one of those places where the weird angles and asymmetries of our house were challenging to work around – the two sets of steps aren’t parallel to each other, and only one is perpendicular to the fence gate. But we embraced it and created an asymmetrical path that connects all the right places.
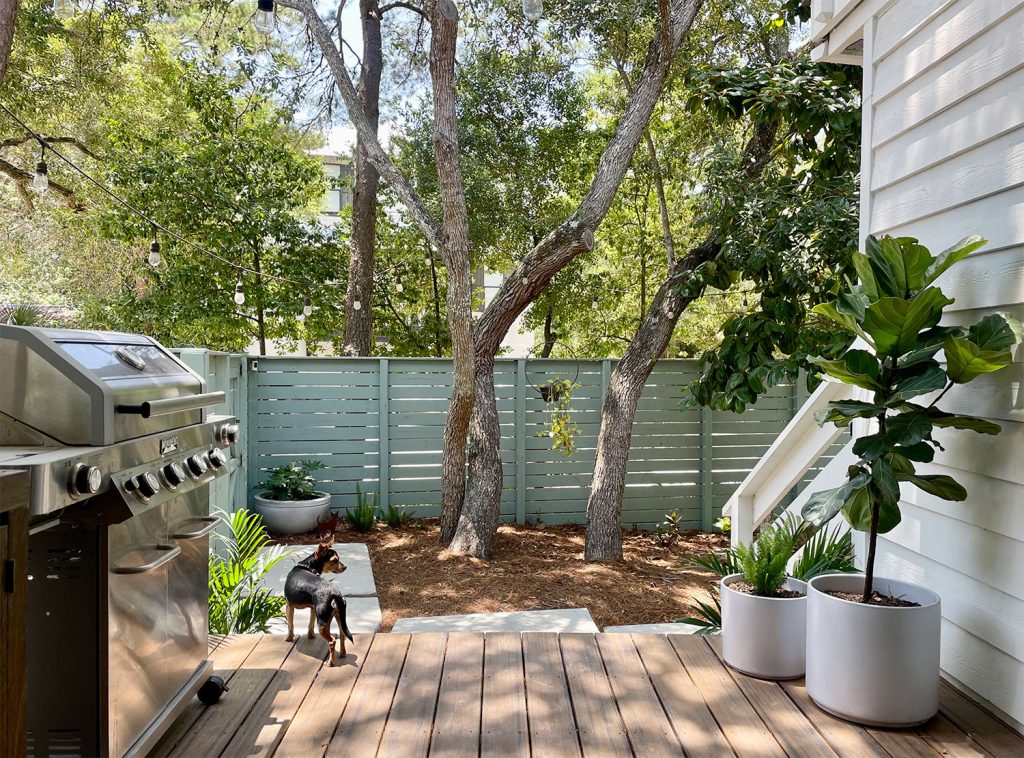
It’s only a total of 4 slabs, all of which you can see below. Three are on the same level and connect the kitchen porch to the gate (which leads to that single-car parking spot we use daily). The 4th slab is one step lower to connect to our bedroom stairs. Basically, we’ve placed these more permanent pathways wherever we need them but didn’t add anything extra, which allows this area to remain largely natural looking. Now if only some of our plants would grow back faster after December’s big freeze!
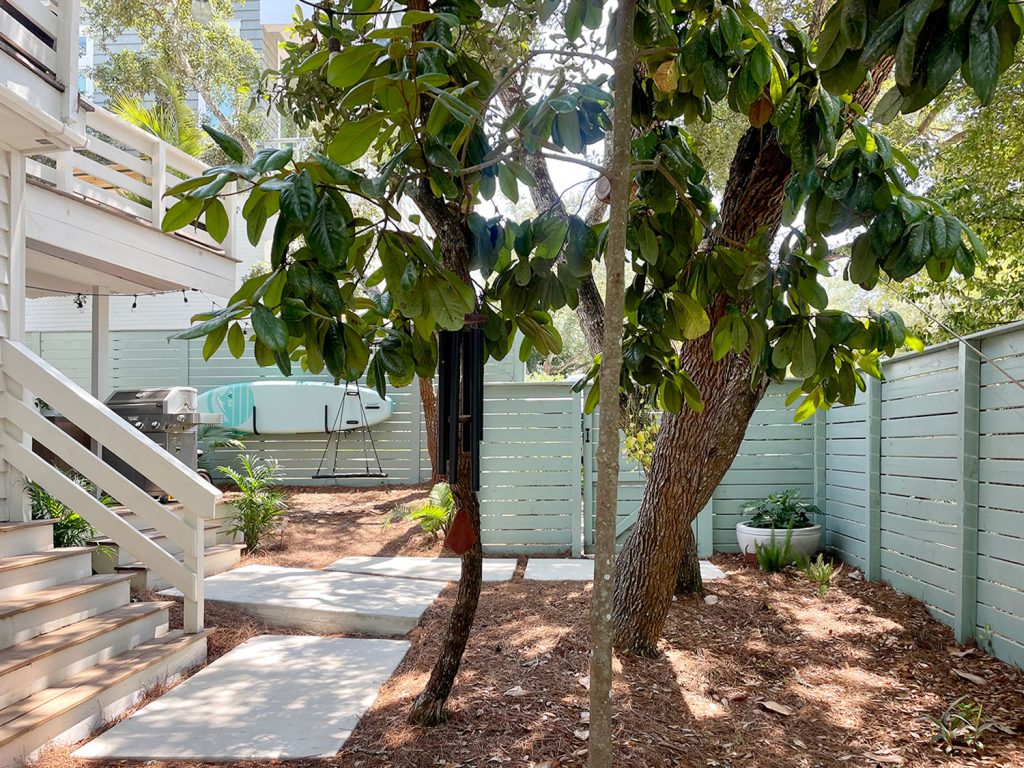
Ok, that wraps up a view of all the new pathways and concrete curbs and things that we added. If you haven’t seen our last post all about our new larger pool area (which has some of our favorite uses of concrete) click here for all of those photos and details.
*This post contains affiliate links, so we may earn a small commission when you make a purchase through links on our site at no additional cost to you.
More posts from Young House Love
Credit : Source Post

